Friday, March 11, 2011

DIY Headboard and Bed Frame from the Idea Room


I LOVE THIS DIY HEADBOARD AND BEAD FRAME! I ALSO LOVE THE COLORS SHE CHOSE AND THE BEDDING. Check it out!

http://www.theidearoom.net/2011/03/diy-headboard-and-bed-frame-by-amy.html

Monday, March 7, 2011

Family Home Evening Board


We love family home evening. B. loves having a specific part of the evening that she is in charge of (especially when she is on treat.) I have looked for a cute FHE chart with just four spots, but never saw one I liked so I created one myself.

I found an old fence post in the garage that was cut to the size I wanted it. I bought cute green double sided damask paper and wooden tags at Roberts. I already had the ribbon, hooks, and vinyl. Over all cost for this project: $2.78.

  1. First I painted the edges of the board and tags black.
  2. I measured the length of the board and cut the paper to the size I needed. I had to do two pieces of paper to make it fit.
  3. Next I traced the tags onto the paper and cut them out.
  4. I then mod podged the paper onto the board and tags. Make sure to use as little mod podge as possible since it will make the paper buckle. However, since this was good thick double sided paper, it didn't bubble.
  5. I measured the board and tag for the size of letters I wanted and cut them out using my silhouette machine.
  6. Next I put the vinyl on to the board and tags. (The silhouette vinyl is horrible and didn't go on straight. The letters keep moving around and don't stick very well.)
  7. Next I added flat sawtooth hooks to the back of the board to hang it on the wall. I also added four hooks to the front to hang the tags on.
  8. I used some black ribbon I had in my stash to hang the tags.
  9. Making sure it was level, we then hung it on the wall.
LOVE IT! Now we have assigned parts for our Family Home Evenings on Monday nights.

Sunday, March 6, 2011

Sewing Room Makeover

A couple weeks ago my girls spent the weekend at Grandma's house. Since I was all caught up on orders, I didn't know what to do with my free time. So I decided to paint my sewing/laundry room. Yea! I have been waiting to do this for a long time. Here is a before picture. Please notice the horrible tan and white sponge painting. It did nothing for the room.

Here is a post from last fall about my desire to paint this room.
http://dreamingofstitches.blogspot.com/search/label/my%20sewing%20space

I picked out a beautiful light blue with a hint of green. It looks gray in the following pictures, but trust me, it looks blue.


I also have been able to play around with my new silhouette machine and create some beautiful vinyl decals for the sewing room. I hung this adorable picture grouping of my girls right by my dryer (see the wall in the picture above.)

I also created a wonderful "Mud Room" area so coats and hats can be hung up when people come in from the garage instead of throwing them on the floor. The full length mirror used to face into the sewing room, now it faces the hallway. I scared myself to death the first time I walked past it. I thought someone was in the sewing room looking at me.

I also made this cute dress for vinyl from silhouette vinyl. HOWEVER... I was planning on putting it on the wall, but am happy how it looks on the magnet board.
THE PROBLEM IS... Silhouette vinyl SUCKS! It doesn't stick very well, it even tries to come off the backing paper when you cut it out forcing you to cut it again and wasting lots of vinyl. It also doesn't stick to the walls or paper very well. Once placed, you can move it around. I created a Family Home Evening board with it and the letters can be easily bumped and moved. NOT COOL.

I bought some vinyl by the foot at Roberts and it is SO MUCH BETTER! It actually sticks... very very well. I made some name signs for my girls bedroom doors. That vinyl is great. My advice is to not buy silhouette vinyl and just get it from Roberts by the foot. It is so much cheaper. You do have to trim the Roberts vinyl from 12 inches down to 9 inches, but it is worth it.

Saturday, March 5, 2011

Quilt Progress


I am so excited for this new quilt I am making for my bedspread. It took me a couple months to finally get all of it cut out. Last week I was able to sew the first two rows together. YEA!!! Here is a sneak peak at my quilt. I can't wait to show you the final product, but that might be a couple more months.

Monday, February 28, 2011

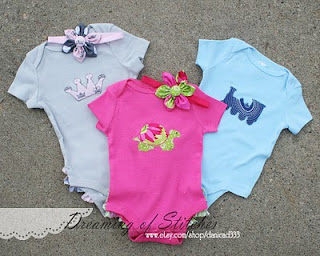
Colored Onesies!


Super cute colored onesies now in the shop! I only have a few onesies in each color. Get them before they are gone!

Tuesday, February 1, 2011

Valentine Specials

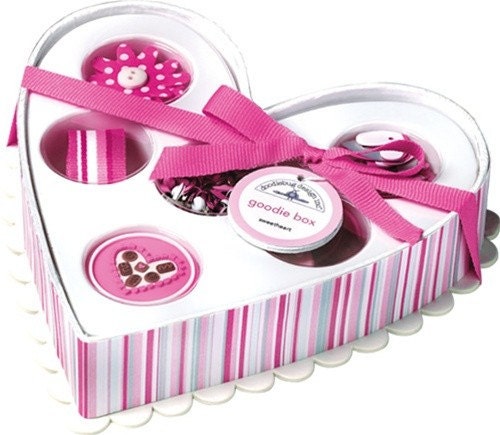
Still time for fabulous Valentine's Gifts for those you love! Check out the great offers from these wonderful vendors from the LDS Etsy Team!

CloseoutGirl:
www.closeoutgirl.etsy.com
www.closeoutgirl.blogspot.com
http://www.facebook.com/pages/Closeout-Girl/161040780579091
*FREE PACK OF SWEET TALK ADHESIVE GEMS WITH ANY PURCHASE $15 AND UP TIL FEB 14, OR SUPPLY RUNS OUT! MENTION "FREE GEMS" IN COMMENTS!
http://www.etsy.com/listing/65772777/sweet-talk-adhesive-gems-by-brenda

PeriwinklePixies:

www.periwinklepixies.blogspot.com
www.periwinklepixies.etsy.com
www.facebook.com/home.php#!/pages/The-Periwinkle-Pixies/151195468232464

PROMOS:
25% OFF all digital prints with code HEARTS25
10% OFF everything else with code HEARTS10

BellaCute:
bellacute.etsy.com
coupon code VAL2011 for 10% off any item


DREAMING OF STITCHES!:
Shop: www.etsy.com/shop/danicad333
Facebook: www.facebook.com/pages/Dreaming-of-Stitches/103184246397462#!/pages/Dreaming-...
Coupon Code: 2RULUV, Save 10%! Good until Valentine's Day.


Passion4Expression:
www.passion4expression.etsy.com


frommylifetoyours:
frommylifetoyours.etsy.com


You-Lee-Ana Boutique
www.etsy.com/shop/iulianalove
www.facebook.com/pages/You-Lee-Ana-Boutique/119965431402999?v=app_4949752878

Claire and Janae
http://www.etsy.com/shop/claireandjanae

Thursday, January 27, 2011

A little crazy


A couple days ago, I was feeling a little crazy and decided to make a Barbie dress for my little girl. My three year old picked out this fabric a while ago and I haven't done anything with it. So I decided to make her Barbies a cute dress out of it.

I used a sewing pattern from the 80's. Barbie must have gotten bigger around since then because I had to alter the pattern to fit her larger rib cage and bum.